This is a simple tutorial on how to upgrade your HPI Baja B5 Servo to a metal gear set.
One of the first upgrades you will want to make on your new Baja is a metal gear set for your steering servo. The servo itself is a good powerful unit that will last a long time once upgraded. From the factory it contains nylon gears that brake and strip easily from the power and weight of the HPI Baja B5.
Parts Needed:
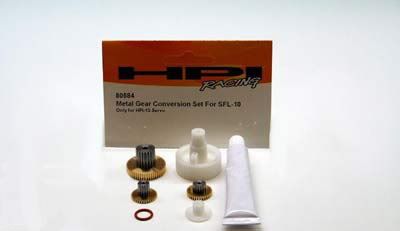
HPI Metal Gear Conversion Set for the SFL-10 Servo (Part #80584)
Tools Needed:
- Needle nose pliers
- 5/64th Hex Wrench
- 3mm Hex Wrench
- Small Phillips head screwdriver
Time Required: 1-2 hours
Skill level: Easy
We will start with the parts needed to complete this task. You will need the HPI Metal Gear Conversion Set for the SFL-10 Servo Part# 80584 It consists of 3 metal gears, 2 Nylon Gears, 1 Rubber O-Ring, and 1 Tube of silicon grease. The package also contains a sheet with directions and pictures.
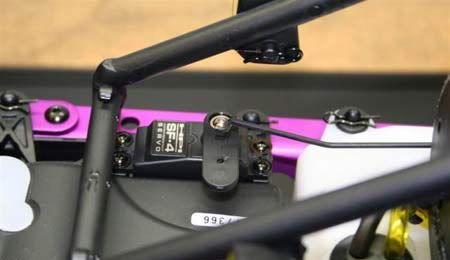
The steering servo is located and mounted under the radio box.
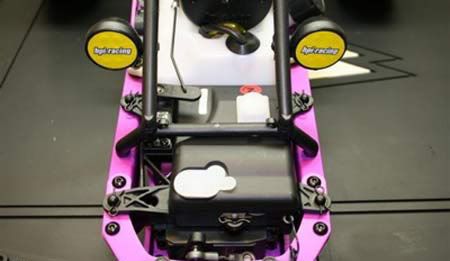
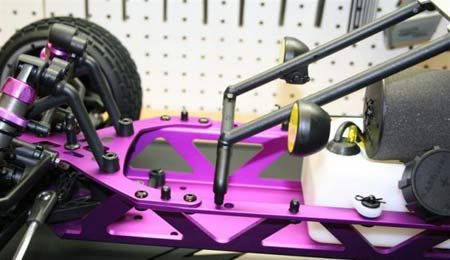
The first step will be to get the roll bar out of the way. At this point you can either remove the entire roll bar or do as I did and just unfasten the front two clips that hold it to the chassis. (See photo below). Use a pair of needle nose pliers and pull the two clips out. There are plastic washers that will fall out when the clips are removed. If they don’t fall out, remove them so they don’t get lost.
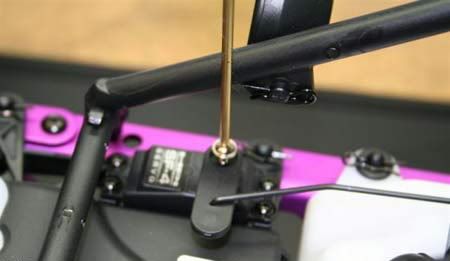
The next thing we are going to do is remove the servo horn from the throttle / brake servo. Use a 5/64th Hex wrench and remove the screw. Pull the servo horn off the servo and remove the linkage end. Now you should place the servo horn back on the servo making sure it goes back in the same exact position it was in when to took it off. This will keep you from having to re-align it later.
Next we need to remove the steering servo linkage from servo saver assembly.
Use a 3mm Hex Wrench and simply unscrew it.
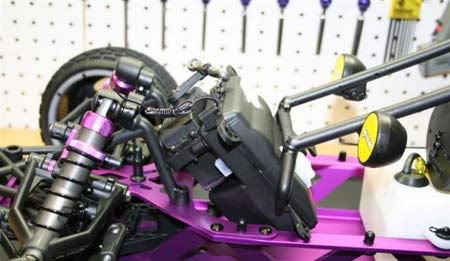
Remove the 4 clips holding the radio box in. Grab the roll bar with one hand and the radio box with the other. Now slide the radio box out while lifting on the roll bar. It should just slide out.
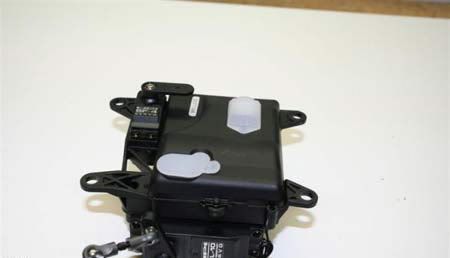
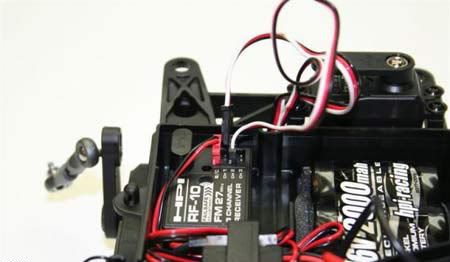
Next we are going to open up the radio box by removing the clip on the front. Inside you will see the receiver, battery and a bunch of wires. We will now unplug the steering servo wire from the receiver. The steering servo wire is located on channel 1. Look on the receiver and there will be numbers marked next to the plugs. Using your fingers, gently pull the plug out.
Take note that the wires are color coded. When you reassemble the radio box, make sure you plug the connector back in the same as the others. Look at the wire colors
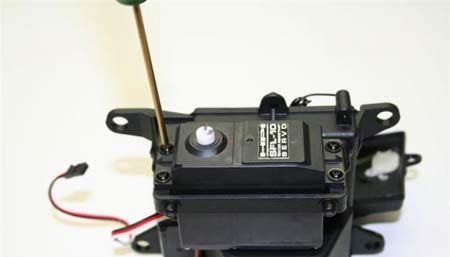
Next we will remove servo horn from the steering servo using a 5/64th hex wrench. Before you remove the horn position it exactly strait up and down. You don’t have to do this but it helps make sure everything inside is aligned.

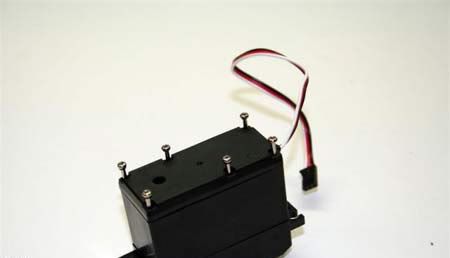
Using a 5/64 Hex Wrench, remove the 4 screws holding the servo to the servo mount. Once this is done, slide the servo out from the holder.
On the bottom of the servo you will see 6 screws. Remove the 6 screws from servo case with a small Phillips head screwdriver. Note that each screw has a rubber O-ring on it. Make sure that it comes out with the screw and is not left in the case. Its helpful to slide the O-ring up to the head of the screw once it is out. The O-ring is designed to help keep moisture out of the servo.
Using your fingers,separate the bottom case cover from the servo. There will be a thin rubber seal, an O-ring if you choose to call it that, that is located on the outer edge of the servo case. It may just fall out when you separate the case or it may not. Remove the case seal and inspect it for damage. If its cut or pinched contact HPI for a replacement.
Now remove the top servo case cover. You may get a hand full of parts when you do this or you may not. If everything falls out don’t worry all is fine. Remove all the gears, they should slide off the pins. Some of the pins and gears may still be inside the top cover so make sure you inspect it. Just like the bottom case cover, there will be a rubber O-ring.
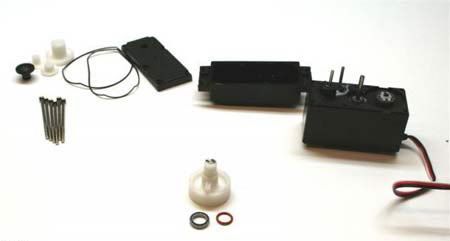
If you are upgrading a used or broken servo, you will need to clean out any broken pieces of gear and any other contamination that may have collected inside. Use a DRY paper towel and some Q-tips to do so.
Now comes the fun part.
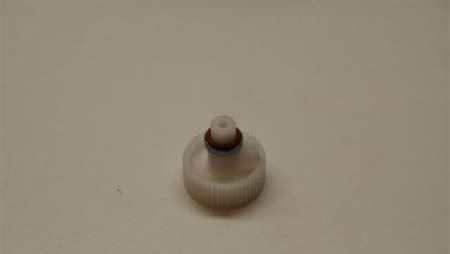
If you are upgrading a brand new servo you can skip this step and just set the main reduction gear with the bearing and seal aside and skip the next step. The main reduction gear in the upgrade kit is the same one that is in the stock servo.
Remove o-ring and bearing from main reduction gear. Using the new gear supplied in the upgrade kit, install the bearing on the shaft. Make sure its properly seated all the way around. Now slide the rubber O-ring over the shaft until its sitting on the top of the bearing.
Place the main reduction gear on servo. Take note of the large tab on the gear. Its important that it placed as shown in the photo below. The tab must be centered and pointing in the direction closest to the side of the servo. looking at the photo it will point to the left.
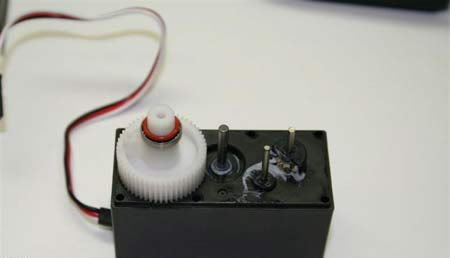
Its puzzle time. Place the rest of the gears on the shafts as shown in the next several photos. Each of the gears are a little different. Look at and match up the gears with the photos. The easiest thing to look at is the thickness of the gears. Again just match them up to the photos and you’ll have no trouble. [COLOR="Red"](Please not that the tab on the main reduction gear MUST be set in the proper place show in the photo above NOT in the position you see in the next few photos.)[/COLOR] The kit contains a tube of white grease. Use small amounts on the gears. There is no need to over do it. Just a small dab on each gear is fine. I placed a dab where ever two gears touched. When the servo is operated it will spread the grease as needed.
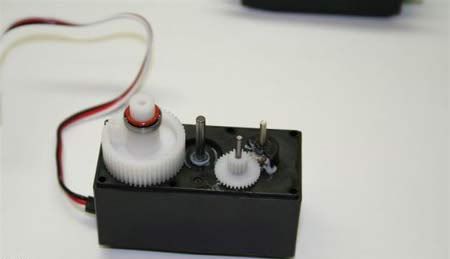
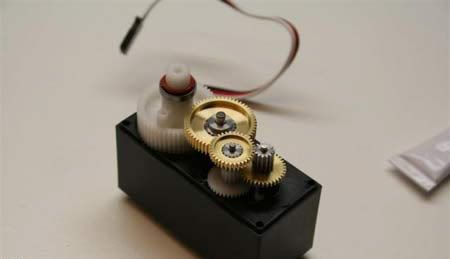
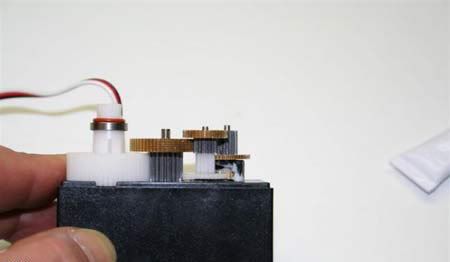

Photo time is over and its time to start putting everything back together.
Place the rubber seal back onto the top of the main servo case. There is a recess that goes all the way around the case. Make sure the O-ring is set into this recess all the way around. Avoid any twisting of the ring and make sure it sits around the case properly and snug. I put a small amount of the white gear lube on my fingers and spread it evenly on the ring before I installed it.
Place the top cover on the servo making sure it properly seats against the O-ring all the way around. It may take some fiddling with to get seated properly. Again, Look at the tab on the main reduction gear and make sure its in the proper position before you place the top cover on the servo.
Place the seal on the bottom of the servo case and install the bottom servo case cover. Again make sure it is properly seated on the O-ring.
Install the 6 screws. There are several things to watch for. First, look to see that the holes line up properly. On my servo, the cover only went on one way. It was close but on my first try, the 4 corners went in fine but the circuit board was just a tiny bit off so the other screws wouldn’t slide in. Is it like this on all servos, I’m not sure. So look before you start to tighten everything up.
Make sure that each screw has the rubber O-ring on it. Slide the ring to the top of the screw closest to the head.
Dont tighten the screws all the way down at this point, just till they touch. Once they are all in take a look and make sure that the top and bottom case covers are properly seated and not pinching the O-ring. Once you are happy with the way it looks, Use a star pattern as you tighten the screws. Dont just fully tighten one and move to the next. If you do that you will most likely damage the O-rings. Dont over tighten them. You want them to be snug but no more then that.
Once the servo is all back together ill recommend that you plug it into the radio and give it a test. It should operate properly in both directions without any nu-natural grinding noises. Set your transmitter steering trim to 0 so the servo is centered properly. At this point its a great time to install the servo horn. I like to do this with the radio on so I know the servo is properly centered.
Place the servo horn back on the servo. It is important to place the horn back on in the proper position. When your looking at the top of servo with the servo horn shaft on the left side the horn should be placed on the shaft 1 spline to the right of center. As you look at a clock it should be at 1:00.
Your on your own now. Go ahead and follow the tutorial backwards to re-install everything. Please use the photos to help refresh your memory if needed. You will want to make sure you don’t pinch any of the servo wires so be careful.
by gonitrohobbies


